���գ�����������Ҫ��װһ����˷dz�ϲ����PDF�����Xodo��ֻ����Microsoft Store���ء����ǣ�ȴ����������ʾ��The store app is blocked. (0x800704EC)����ٶȾ��飬����Internetѡ�ȫ�ȼ���ȡ���������������ã��Բ���Ч�� ��������Microsoft Community�������ˣ���ʾ��ע��������� HKEY_CURRENT_USER\\SOFTWARE\\Policies\\Microsoft\\RemoveWindowsStore is already set to 0. But I search for RemoveWindowsStore and found another key with the same namein HKEY_LOCAL_MACHINE\\SOFTWARE\\Policies\\Microsoft\\WindowStore\\ which was set to 1. By setting it to 0 solves my problem. ��������������
Windows 10 ���������ȫ�� ��ƽ �ҶԼ��������˵һ�ϲ�ͨ�����ض�����ѧϰ����������ģ����Զ��ڼ��������������Ӧ������֪һ�����ˡ�������� Win7 �� Win8 ������������� Win10, ���Լ�ʹ�õIJ�����Щϵͳ����˶������������Ȼ������Ȥ�����ǣ��Ҹ���Ȥ���������ص����ű��������� 2015 �� 8 �� 3 �� �� Win10 ��ʽ���Ѿ����� 5 ���ˣ��̶̵ļ����ڣ�ˢ���˶����¼�� 24 Сʱ��װ�û��ﵽ 1400 ��Ϊ��װ������������ Windows ϵͳ�����ڣ���һ������ͷ���������� ����������վͨѶ���������� StatCounter ��������ʾ���� 15 �������û��У�2015��8��3���Ѿ��� 2.74% ���û��Ѿ�װ���� Windows 10 ���� 7 �� 30 �� �� Windows 10 ������ϵͳ����ռ�ݶ��Ϊ 0.58%( ��Ҳ������ Chrome ϵͳ 0.26% �ķݶ� ) ���������ٶ�ȷʵ̫��Ѹ�ͣ������� Win10 ������װ������ 10 �ڴ�ص�Ŀ��Ҳ������ǰʵ�֡� �����й��� Win10 �ݶ� 8 �� 1 �� Ϊ 1.91% �� 8 �� 2 �� ������ 2.08% ��3��������2.09%������ Mac OS X ��ռ���� 1.37% �� Win8 ��ռ���� 1.83% ����Ȼ Win7 �� Win XP ���й��û���ռ���ʳ��� 80% ���ֱ������ 57.88% �� 22.43% �����г��ݶ�������ļ����ƹ㣬��֮ȫ�� Windows 10 PC �����У��б�������һ���ݻ���������������֮ǰ�� Windows 8 /8.1 �� Win10 ��Ȼ�Ѿ�Ӯ�����������ϡ�ʵ�������������ֹۣ� Win10 ���������Ҫ����֧���Լ�����˽Ϊ���ۣ�������Ϣ������Ĵ��������Ĵ�ѧ����ʵ���������Σ� Director of UWA Centre for Software Practice at University of Western Australia ������������˹�� David Glance ���� 2015 �� 8 �� 4 �� �ڡ��Ի����� The Conversation ����վ���������ġ��� David Glance . Windows 10 is not really free: you are paying for it with your privacy �� The Conversation �� August 4, 2015 12.44pm AEST Ϊ�˱����Ķ�����ժ�����£�����Ҳο��� Windows 10 is not really free: you are paying for it with your privacy David Glance The Conversation �� August 4, 2015 12.44pm AEST Windows 10, it seems, is proving a hit with both the public and the technology press after its release last week. After two days, it had been installed on 67 million PCs. Of course, sceptics may argue that this may have simply been a reflection of how much people disliked Windows 8 and the fact that the upgrade was free. For others, though, it is the very fact that the upgrade is free that has them concerned that Microsoft has adopted a new, ��freemium�� model for making money from its operating system. They argue that, while Apple can make its upgrades free because it makes its money from the hardware it sells, Microsoft will have to find some way to make money from doing the same with its software. Given that there are only a few ways of doing this, it seems that Microsoft has taken a shotgun approach and adopted them all. The question is whether it��s really ��free��. Microsoft Click to enlarge Free upgrade Chris Capossela, Microsoft��s Chief Marketing Officer, has declared that Microsoft��s strategy is to ��acquire, engage, enlist and monetise��. In other words, get people using the platform and then sell them other things like apps from the Microsoft App Store . The trouble is, that isn��t the only strategy that Microsoft is taking. Microsoft is employing a unique ��advertising ID�� that is assigned to a user when Windows 10 is installed. This is used to target personalised ads at the user. These ads will show up whilst using the web, and even in games that have been downloaded from the Microsoft App Store. In fact, the game where this grabbed most attention was Microsoft��s Solitaire, where users are shown video ads unless they are prepared to pay a US$9.99 a year subscription fee. The advertising ID, along with a range of information about the user, can be used to target ads. The information that Microsoft will use includes : current location, search query, or the content you are viewing. likely interests or other information that we learn about you over time using demographic data, search queries, interests and favorites, usage data, and location data. It wasn��t long ago that Microsoft was attacking Google for similar features it now includes in Windows 10. Internet Archicve Click to enlarge It was not that long ago that Microsoft attacked Google for doing exactly this to its customers. What Microsoft is prepared to share, though, doesn��t stop at the data it uses for advertising. Although it maintains that it won��t use personal communications, emails, photos, videos and files for advertising, it can and will share this information with third parties for a range of other reasons . The most explicit of these reasons is sharing data in order to ��comply with applicable law or respond to valid legal process, including from law enforcement or other government agencies��. In other words, if a government or security agency asks for it, Microsoft will hand it over. Meaningful transparency In June, Horacio Guti��rrez, Deputy General Counsel Corporate Vice President of Legal and Corporate Affairs at Microsoft, made a commitment to ��providing a singular, straightforward resource for understanding Microsoft��s commitments for protecting individual privacy with these services��. On the Microsoft blog , he stated: In a world of more personalized computing, customers need meaningful transparency and privacy protections. And those aren��t possible unless we get the basics right. For consumer services, that starts with clear terms and policies that both respect individual privacy and don��t require a law degree to read. This sits in contrast to Microsoft��s privacy statement, which is a 38 page, 17,000 word document. This suggests that Microsoft really didn��t want to make the basic issues of its implementation absolutely clear to users. Likewise, the settings that allow a user to control all aspects of privacy in Windows 10 itself are spread over 13 separate screens . Also buried in the privacy statement is the types of data Cortana �C Microsoft��s answer to Apple��s Siri or Google Now �C uses. This includes: device location, data from your calendar, the apps you use, data from your emails and text messages, who you call, your contacts and how often you interact with them on your device. Cortana also learns about you by collecting data about how you use your device and other Microsoft services, such as your music, alarm settings, whether the lock screen is on, what you view and purchase, your browse and Bing search history, and more. Note that the ��and more�� statement basically covers everything that you do on a device. Nothing, in principle, is excluded. Privacy by default It is very difficult to trust any company that does not take a ��security and privacy by default�� approach to its products, and then makes it deliberately difficult to actually change settings in order to implement a user��s preferences for privacy settings. This has manifested itself in another Windows 10 feature called WiFi Sense that has had even experts confused about the default settings and its potential to be a security hole. WiFi Sense allows a Windows 10 user to share access to their WiFi with their friends and contacts on Facebook, Skype and Outlook. The confusion has arisen because some of the settings are on by default, even though a user needs to explicitly choose a network to share and initiate the process. Again, Microsoft has taken an approach in which the specific privacy and security dangers are hidden in a single setting. There is no way to possibly vet who, amongst several hundred contacts, you really wanted to share your network with. There are steps users can take to mitigate the worst of the privacy issues with Windows 10, and these are highly recommended. Microsoft should have allowed users to pay a regular fee for the product in exchange for a guarantee of the levels of privacy its users deserve.
1. Windows Management Instrumentation: Enable service to automatic 2. ��װLenovo�������������� �Զ���⡢��װ���� 3. �����ڰ�װ��һ��������t400��Ļ����������˲��������һ���̬�� ���������Mobile Intel(R)4 Series Express Chipset Family ע�ͣ� ��ѡ��װ �������ǰ����ʾ�������߰汾�Ѱ�װ���Ƿ���Ҫɾ������ ���ǵ������ܾɡ����ϣ��������Կ��ɰ汾 ����Ҳ�����õ��뷨������ѡ�Ǹ��汾�� 4. http://www.sevenforums.com/graphic-cards/35738-another-display-not-detected-wth-2.html Device manager. Right click on the other device (not NVIDIA one) under display adapters. Choose disable. Reboot. ��������������ҵ�DeviceManager- Display adapters: ����֮ǰ��˲����Ļ����������ֱ������һ�����������⣺ATI Mobility Radeon HD 3400 Series ���Ͻ���Disable�� ���� Mobile Intel(R)4 Series Express Chipset Family�� ��Ȼ��Ч����
windows XP���գ�Ӱ���������й���������˾�ͷ��ĵ����� ����������ʵʵʹ���������������ذ�Ȩ���ߣ�Ӱ����������Щ��Ȼ���Ӱ�Ȩ����������˾���Լ���Щ���ڸ���ԭ��ʹ�õ���������������Ƶĵ�λ�������ڼƵĴ��ڡ� �ڽ��������£������������������ģ��������ڽ������������Լ��Ĵ��죬������ǵĽ��Dzп���϶���
ͬѧ�Ƽ���һ����Win 7 ϵͳ�����ϰ�װLinux�ĺ÷�����û�з������鷳��ֻ��Ҫ����һ��wubi.exe�ļ���ж��Ҳ�ܷ��㡣������������ַ With Wubi, our officially supported Ubuntu installer for Windows, you can install and uninstall Ubuntu easily and safely. For 12.04 LTS only. http://www.ubuntu.com/download/desktop/windows-installer �ո��в����Ƽ���wine����װҲ�ܷ��㣬�������� http://www.winehq.org/download / �������һ��ʱ��UBUNTU��ϵͳ���бȽ��������ܺ�Ubuntu����ά��������Ч��ռ����Դ�йء���ǰ�ù� linux mint���ǵ�ͦ��ģ��пջ������ԡ����ص�ַ ��2013��12��4�ո��£� http://www.linuxmint.com/edition.php?id=143
http://superuser.com/questions/28912/cannot-delete-item-could-not-find-this-item-issue when deleting, the following information pops Could not find this itemThis is no longer located in C:\Users\This_User\Desktop. verify the item'slocation and try again. Answer: I know you said that you tried deleting the shortname of the file and it didn't work for you, but it does work for some forms of this problem. It worked for me. So for the sake of completeness I am mentioning it here. Step by step: press windows key + r type cmd.exe , press enter cd \to\the\folder\containing\the\problem\file dir /x Note the short filename of the problem file. It will look for example like BLAH~1 . del BLAH~1 ~~~~~~~~~~~~~~~~~~~~~~~~~~~~~~~~~~~~~~~~~ solution 2�� Ah ha!!! I did it!!! This was so annoying but after several hours... it dawned on me. Basically, you make a folder with the same name as the missing folder, then you drag the folder into the folder with the missing folder. Windows did not ask me to combine the folders, but after that, Windows knows where the folder is and you can delete it. I didn't try to copy and pasted I'm guessing that would work too. This solution works on Windows 7. Please post if it works on previous versions. �C Cale Mar 28 '11 at 5:44 Genius! this works! I had the same problem after extracting a zip file (from Program Files\Visual Studio) into my user\downloads folder. It resulted in a weird folder containing files I couldn't access or delete. I followed this advice, Win 7 asked me to merge which I said yes to, and then it let me delete the folder with no fuss. �C Mark Heath May 31 '11 at 19:25 didn't work for me - I then somehow had 2 identically named folders in alongside eachother! �C Shevek Jan 28 '12 at 10:49 ~~~~~~~~~~~~~~~~~~~~~~~~~~~~~~~~~~~~~~~ solution 3�� I'm not sure if Windows 7 has Command Prompt. But you can delete it from Command Prompt. Go to the said directory and then use the command del against the file name. Go to Command Prompt Windows + R cd C:\Users\This_User\Desktop del filename.abc This should work.
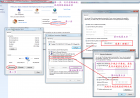
�ر�WINDOWS�� watch dog ���ܣ�cuda������windows����ʱ���У� ������ ��ע���б����������±�������������ΪDWORDS��: HKEY_LOCAL_MACHINE\SYSTEM\CurrentControlSet\Control\GraphicDrivers\ HKEY_LOCAL_MACHINE\SYSTEM\CurrentControlSet\Control\GraphicDrivers\Timeout C) ͼ��˵�� : a) ��ע���б� b) HKEY_LOCAL_MACHINE\SYSTEM\CurrentControlSet\Control\GraphicDrivers\ c) HKEY_LOCAL_MACHINE\SYSTEM\CurrentControlSet\Control\GraphicDrivers\Timeout û�еĻ��½����� d) ���������
LargeText File Viewer 5.2- for Windows User LargeText File Viewer 5.2 - Features Features | Screenshots | Download Have you ever felt frustrated when you just want to look at the content of a large text file but it takes forever for Notepad or Word to open it? This program was designed for viewing large (1GB) text files. It uses little memory and is able to open a gigabyte file instantly. Background file indexing makes browsing even faster. It opens files that are currently being written by other programs, and automatically checks and reads the files if new contents have been appended. It supports view split. The user may split the view either horizontally or vertically, and have each side show different portion of the same file. It allows the user to perform high-speed complex text search by means of plain text or regular expression. The regular expression syntax is slightly different from the standard ones. Please click here for details. The regular expressions for finding the following items have been provided as preset for the convenience of the users: quoted string hexadecimal integer floating-point number date of any format time of any format domestic phone number (US Canada) social security number IP address email address http address ftp address For CSV (Comma Separated Value) files, when the user hovers the mouse over any field in the file, a hint automatically appears with the field name.
���ȸ�������������������ӣ� DEMO_LilySoundRecord.zip ���� http://vdisk.weibo.com/s/BGYN_7_XZYfQh һ����¼�����������û�������������¼�ƣ���ŵ�һ��wav�ļ��У����š���¼���Ͳ�������ʾ�����IJ��Ρ� This is a sound recording program DEMO, LilySoundRecord.exe v1.0. First, given the software download link: http://vdisk.weibo.com/s/BGYN_7_XZYfQh A simple recording program, enter the user's voice can be recorded, stored in a wav file playback. In the recording and playback of sound waveform display.
http://www.mydigitallife.info/how-to-disable-and-turn-off-uac-in-windows-7/ How to Disable and Turn Off UAC in Windows 7 The user interface of User Account Control (UAC) settings in Windows 7 has changed to reflect the move to make UAC less annoying, more user control and more user friendlier approach. In Windows 7, the UAC has a slider bar which allows users to configure and select which level of notification (and hence protection against unauthorized and malicious access) they want. With the fine-tuning of UAC, the wording ��disable�� or ��turn off�� is no longer available. So how can you disable UAC? Or at least, how can you turn off the notification prompt or pop-up so that they appear less regularly? In fact, the steps to disable UAC is Windows 7 is similar to steps to disable UAC in Windows Vista , only with slight user interface change, and there is plenty of methods to turn off UAC too. Method 1: Disable or Turn Off UAC (User Account Control) in Control Panel To user Control Panel to disable UAC in Windows 7, there are several methods to access the User Account Control settings page: Go to Start Menu - Control Panel - User Accounts and Family Safety - User Account. Go to Start Menu - Control Panel - System and Security - Action Center. Click or right click on Flag icon in notification area (system tray), and then Open Action Center. Type ��MsConfig�� in Start Search to start System Configuration, then go to Tools tab, select Change UAC Settings, then click on Launch button. Click on User Account Control settings link. Slide the slider bar to the lowest value (towards Never Notify), with description showing Never notify me. Click OK to make the change effective. Restart the computer to turn off User Access Control. Method 2: Disable UAC with Registry Editor (RegEdit) Run Registry Editor (RegEdit). Navigate to the following registry key: HKEY_LOCAL_MACHINE\Software\Microsoft\Windows\CurrentVersion\Policies\System Locate the following REG_DWORD value: EnableLUA Set the value of EnableLUA to 0. Optional step to suppress UAC consent prompt dialog, locate the following REG_DWORD value: ConsentPromptBehaviorAdmin Set the value of ConsentPromptBehaviorAdmin to 0 (optional). Exit from Registry Editor and restart the computer to turn off UAC. Method 3: Turn Off UAC Using Group Policy For Windows 7 Ultimate, Business or Enterprise edition which has Local Group Policy, or computer joined to domain and has Active Directory-based GPO, the group policy can be used to disable UAC for local computer or many computer across large networks at once. Enter GPedit.msc in Start Search to run Local Group Policy editor. (Or gpmc.msc to run Group Policy Management Console for AD-based domain GPO editor). Navigate to the following tree branch: Computer Configuration - Windows Settings - Security Settings - Local Policies - Security Options In GPMC, browse to the required GPO which is linked to the domain or OU where the policy wants to apply. Locate the following policy in the right pane: User Account Control: Behavior of the elevation prompt for administrators in Admin Approval Mode Set its value to Elevate without prompt. Locate the following policy in the right pane: User Account Control: Detect application installations and prompt for elevation Set its value to Disabled. Locate the following policy in the right pane: User Account Control: Run all administrators in Admin Approval Mode Set its value to Disabled. Locate the following policy in the right pane: User Account Control: Only elevate UIAccess applications that are installed in secure locations Set its value to Disabled. Restart the computer when done. Method 4: Using Command Prompt to Disable User Account Control The command line option can also be used in batch script command file, i.e. .bat and .cmd files, providing greater convenient to advanced technical user. In actual, the commands,, which are also used to disable or enable UAC in Vista , are just doing the same thing as directly modifying the registry. Open an elevated command prompt as administrator. To disable the UAC, run the following commands: %windir%\System32\cmd.exe /k %windir%\System32\reg.exe ADD HKEY_LOCAL_MACHINE\SOFTWARE\Microsoft\Windows\CurrentVersion\Policies\System /v EnableLUA /t REG_DWORD /d 0 /f and optionally, the following comand to suppress all elevation consent request and notification: %windir%\System32\cmd.exe /k %windir%\System32\reg.exe ADD HKEY_LOCAL_MACHINE\SOFTWARE\Microsoft\Windows\CurrentVersion\Policies\System /v ConsentPromptBehaviorAdmin /t REG_DWORD /d 0 /f Tip: To re-enable UAC, the command is: %windir%\System32\cmd.exe /k %windir%\System32\reg.exe ADD HKEY_LOCAL_MACHINE\SOFTWARE\Microsoft\Windows\CurrentVersion\Policies\System /v EnableLUA /t REG_DWORD /d 1 /f and to turn on prompt for consent UI: %windir%\System32\cmd.exe /k %windir%\System32\reg.exe ADD HKEY_LOCAL_MACHINE\SOFTWARE\Microsoft\Windows\CurrentVersion\Policies\System /v ConsentPromptBehaviorAdmin /t REG_DWORD /d 2 /f Disable UAC may cause gadget not working in Windows 7. User who facing the issue can use another workaround to suppress User Account Control .
���ʿռ�վΪ��ʹ���Բ���ϵͳ���ȶ��ͱ���ά������Windows�л���Linux����ϵͳ�����Windows��Linux�Ŀ����ԣ�ʹ�������ܸ��ȶ���Ҳ�����������߸����� ��We migrated key functions from Windows to Linux because we needed an operating system that was stable and reliable �C one that would give us in-house control. So if we needed to patch, adjust or adapt, we could, said Keith Chuvala of the United Space Alliance, which runs opsLAN for NASA. Linux is already used to run various systems aboard the ISS, including the world's first 'Robonaut', sent to the Space Station in 2011. 'R2' can be manipulated by astronauts as well as ground controllers and is designed to carry out tasks too dangerous or mundane for astronauts in microgravity, according to the Linux Foundation. �й��Ŀ��������������п����ƹ��ռ�Linux����ϵͳ�ij�����Linux���յ��Ĺ�עҲԽ��Խ�ࣻ�����ܻ������� �����Ķ��� http://www.telegraph.co.uk/technology/news/10049444/International-Space-Station-to-boldly-go-with-Linux-over-Windows.html
http://www.dummies.com/how-to/content/activate-hybrid-sleep-on-windows-pcs.html Activate Hybrid Sleep on Windows PCs By Dan Gookin from Troubleshooting Your PC For Dummies, 3rd Edition Somewhere between Sleep mode and hibernation is the hybrid sleep feature for your Windows 7 or Vista PC. (Hybrid sleep is not available in Windows XP). It��s like hibernation in that information stored in memory ( RAM ) is saved to disk but the computer doesn��t fully turn itself off. Instead, as when it��s in Sleep mode, you can quickly resume computer operation by touching a key or moving the mouse . The advantage of hybrid sleep is that you can quickly resume computer operations and avoid the risk of losing data if the power goes out. But to use hybrid sleep, it must be activated. Here��s how: Open the Control Panel. Click the Hardware and Sound heading. Click the Power Options heading. You see a list of power plans for your computer. One of them is selected, which shows the power savings plan your PC uses. Click the link Change Plan Settings beneath the selected plan. Click the link Change Advanced Power Settings. The Power Options dialog box appears. Open the Sleep item by clicking the plus (+) sign. Open the item Allow Hybrid Sleep. Click the blue text and choose On from the button menu. When your PC has two power sources, you need to choose On for both settings. Click OK to confirm your choice and activate hybrid sleep. Close the remaining dialog boxes and windows. When hybrid sleep is active, choosing the Sleep command places the computer into Hybrid Sleep mode. Hybrid sleep isn��t available in Windows XP. If you have disabled hibernation, the hybrid sleep feature may not function properly. Specifically, hybrid sleep may not recover unsaved data if the feature is on and the power goes out.
Windows server 2003 64λ+ArcGIS10ϵ��+Oracle11 64 ���ڰ�desktop��engine��sde��serverȫ����װ���ˡ� ��·ϵͳ������ϣ���ʼ�µ����̣� �������̫�������ˣ�esri��Ŭ���£������ܰѲ�Ʒ��ĸ�С�����ð�װ�ɣ����� ����Ҳ�����������⣬��Ҫ���£� 1 oracle ʹ��database control �������ݿ�ʱ��Ҫ���ڵ�ǰoracle��Ŀ¼�����ü�������������Netca������ http://210.43.24.222/chy/3sbase/news/?1009.html 2 ͨ��ArcCatalog SDE���Դ���ʸ������դ������У�������� http://210.43.24.222/chy/3sbase/news/?1016.html 3 ArcCatalog����GIS Servers����access denied :either the som service on machine... . http://210.43.24.222/chy/3sbase/news/?1015.html
The running environment of software is similar to the career development of human being. In Bioinformatics, many tools were designed for Linux user. You can find a particular tool working in Windows. It may work pretty well. However, if you want to build a complicated and powerful pipeline. More efforts are required in Windows, because you have no much supports from other existing tools. Choose a "correct" environment for you to put your mind of full.
һ��iGraph�İ�װ igraph��װ�Ƚϼ�ֱ����http://igraph.sourceforge.net/download.html����python��װ�����ɡ� �����ҿ�ʼ��ͼ�����ֱ������������£� raise TypeError("plotting not available") TypeError: plotting not available ���������������ҵ����½����������Ҫԭ����igraph������һ����û��װ����װ�������� ԭ�ĵ�ַhttp://chuanwang66.iteye.com/blog/1704942 Graph plotting in igraph on Windows��cairo��dll����װ��C:\Python25\Lib\site-packages\cairo�� Graph plotting in igraph is implemented using a third-party package called Cairo . If you want to create publication-quality plots in igraph on Windows, you must also install Cairo and its Python bindings. The Cairo project does not provide pre-compiled binaries for Windows, but other projects depending on Cairo do, so the preferred way to install Cairo on Windows along with its Python bindings is as follows: Get the latest PyCairo for Windows installer from http://ftp.gnome.org/pub/gnome/binaries/win32/pycairo/1.8 . Make sure you grab the one that matches your Python version. At the time of writing, the above folder contained installers for Python 2.6 only. You may also try and go one level up, then down then 1.4 subfolder �C these are older versions, but they work with Python 2.5 and Python 2.6 as well. Install PyCairo using theinstaller .(���õ���pycairo-1.4.12-2.win32-py2.5.exe) The installer extracts the necessary files into Lib\site-packages\cairo within the folder where Python is installed. Unfortunately there are some extra DLLs which are required to make Cairo work, so we have to get these as well. Head to http://ftp.gnome.org/pub/gnome/binaries/win32/dependencies/ and get the binary versions of Cairo ( cairo_1.8.10-3_win32.zip at the time of writing), Fontconfig ( fontconfig_2.8.0-2_win32.zip ), Freetype ( freetype_2.4.4-1_win32.zip ), Expat ( expat_2.0.1-1_win32.zip ), libpng ( libpng_1.4.3-1_win32.zip ) and zlib ( zlib_1.2.5-2_win32.zip ). Version numbers may vary, so be adaptive! Each ZIP file will contain a bin subfolder with a DLL file in it. Put the following DLLs in Lib\site-packages\cairo within your Python installation: freetype6.dll (from freetype_2.4.4-1_win32.zip ) libcairo-2.dll (from cairo_1.8.10-3_win32.zip ) libexpat-1.dll (from expat_2.0.1-1_win32.zip ) libfontconfig-1.dll (from fontconfig_2.8.0-2_win32.zip ) libpng14-14.dll (from libpng_1.4.3-1_win32.zip ) zlib1.dll (from zlib_1.2.5-2_win32.zip ). Having done that, you can launch Python again and check if it worked: Python���� from igraph import * g=Graph.Famous( "petersen" ) plot(g) --------------------------------------------------------------------------------------------------------------------------------- ע�⣺ ������ʱ�������������´��������ʱû�н�cairo��dll���뻷������path �����ǽ���������ʱ�ο����ĵ��� �ĵ����� Hi,IhavejustinstalledigraphandIamhavingaproblemwithplotting. Ihavefollowedtheinstructionsonthedocumentationsite http://www.cs.rhul.ac.uk/home/tamas/development/igraph/tutorial/install.html#graph-plotting-in-igraph-on-windows whichincludesinstallingpycairo,andputtingtherequireddllfilesinto Python2. 6 \Lib\site-packages\cairo igraphitselfhasinstalledproperly,asrunning importigraph.test igraph.test.test() givesnoerrors,andalltestswork. However,whenItrytorun fromigraphimport* g=Graph.Famous( "petersen" ) summary(g) plot(g) Igetthefollowingerror: Traceback(mostrecentcalllast): File "C:\DocumentsandSettings\fulford\Desktop\netstuff\test1.py" ,line 4 , inmodule plot(g) File "C:\Python26\lib\site-packages\igraph\drawing.py" ,line 762 ,inplot result=Plot(target,bbox) File "C:\Python26\lib\site-packages\igraph\drawing.py" ,line 222 ,in__init__ self._surface_was_created=notisinstance(target,cairo.Surface) File "C:\Python26\lib\site-packages\igraph\drawing.py" ,line 51 ,in __getattr__ raiseTypeError, "plottingnotavailable" TypeError:plottingnotavailable Ialsotriedthefollowing: importcairo butgottheerror: Traceback(mostrecentcalllast): File "pyshell#2" ,line 1 ,inmodule importcairo File "C:\Python26\lib\site-packages\cairo\__init__.py" ,line 1 ,inmodule from_cairoimport* ImportError:DLLloadfailed:Thespecifiedmodulecouldnotbefound. Iamfairlynewtopython,soamwonderingifthereissomethingelseIneeded todo,likeaddsomethingtomypathvariablesothatthedllfilesarefound? Anyhelporsuggestionsanyonecangivemewouldbemuchappreciated,sicveI wouldverymuchliketousethissoftware.. ThanksGlenn. PSplatformdetails: Platform:WindowsXP Pythonversion 2.6 ( 32 bitr)(enthoughtpythondistribution 6.2 ) DrGlennFulford+ 61 7 313 85196 QUTMathematicalSciences, GPOBox 2343 Brisbane,QldAUSTRALIA 4001 .Cricosno.00213J email:address@hidden; ------------------------------------------------------------------------------------- DearGlenn, ItseemslikethePythonbindingsofCairoarenotinstalledproperlyon yourmachine--igraphsimplyreportsthiswhenitsays"plottingnot available". IcheckedaworkinginstallationonWindowsXP( 32 -bit)andthe followingfilesshouldbepresentin c:\python26\lib\site-packages\cairo: __init__.py _cairo.pyd libcairo- 2 .dll libexpat- 1 .dll libfontconfig- 1 .dll libpng14- 14 .dll zlib1.dll TheerrormessageyouseemeansthatPythonfinds__init__.pyinthe cairosubfoldersuccessfully,andittriestoimport_cairo.pydfrom there.(.pydfilesarelikeordinary.dllfiles,Pythonjustusesa differentextensiontodistinguishthemfrom.dlls).Unfortunatelythe importcanfailforatleasttworeasons: 1 )_cairo.pyditselfismissing 2 )_cairo.pydisthere,butoneofitsdependenciesismissing. Unfortunately,theerrormessageisthesameinbothcases.So,I'ddo thefollowing: 1 .CheckwhetherallthefilesImentionedaboveareinthe site-packages\cairofolder.Ifnot,installthem. 2 .Iftheyareallthere,downloadDependencyWalkerfrom www.dependencywalker.comandopen_cairo.pydwithit.DependencyWalker shouldrecursivelytraversethedependencytreeof_cairo.pydandreport anyotherDLLsthatyouaremissing. -- Tamas ------------------------------------------------------------------------------------- DearTamas, thanksverymuchforyoursuggestions.IbeleiveIeventiuallytrackeddownthe problem. Ifoundthefollowingwebpageveryuseful. http://alex.matan.ca/install-cairo-wxpyton-pycairo-python-windows Firstthingittoldmewastoappendc:\Python26\Lib\site-packages\cairotomy path,whichIhadn 'tdone,butthisdidn' tfixtheproblem. Ithenreinstalledthedllfiles,thistimefromthewxpythionsite.Thiat seemedtofixtheproblem.Sonotsurreexactlywhichdllitwas,butIcan comparethemnifanyoneisinterested. Glenn ����iGraphʹ�� �ο����� http://www.cs.rhul.ac.uk/home/tamas/development/igraph/tutorial/tutorial.html
http://scienceblog.com/ Feel-good glass for windows helps hormone balance Scientists discover bees can ��turn back time,�� reverse brain aging First photo of shadow of single atom Quantum computing, no cooling required Fish learn to cope in a high CO2 world Delivering drugs via skin moisturizers Downy dinosaur discovered Parents less likely to develop colds Childhood adversity increases risk for depression and chronic inflammation Oh, Baby! A Young Star Flaunts its X-ray Spots in McNeil��s Nebula Mass extinctions reset the long-term pace of evolution Searching for an ancient syphilis DNA in newborns Snuggling may doom bats to fungal disease 5 or more cups of coffee a day cuts IVF success in half Say goodbye to foot and mouth disease?
Called GraphExeter, the material could revolutionise the creation of wearable electronic devices, such as clothing containing computers, phones and MP3 players. GraphExeter could also be used for the creation of ��smart�� mirrors or windows, with computerised interactive features. Since this material is also transparent over a wide light spectrum, it could enhance by more than 30% the efficiency of solar panels. Adapted from graphene, GraphExeter is much more flexible than indium tin oxide (ITO), the main conductive material currently used in electronics. ITO is becoming increasingly expensive and is a finite resource, expected to run out in 2017. These research findings are published in Advanced Materials , a leading journal in materials science. At just one-atom-thick, graphene is the thinnest substance capable of conducting electricity. It is very flexible and is one of the strongest known materials . The race has been on for scientists and engineers to adapt graphene for flexible electronics. This has been a challenge because of its sheet resistance, which limits its conductivity. Until now, no-one has been able to produce a viable alternative to ITO. To create GraphExeter, the Exeter team sandwiched molecules of ferric chloride between two layers of graphene. Ferric chloride enhances the electrical conductivity of graphene, without affecting the material��s transparency. The material was produced by a team from the University of Exeter��s Centre for Graphene Science. The research team is now developing a spray-on version of GraphExeter, which could be applied straight onto fabrics, mirrors and windows. Lead researcher, University of Exeter engineer Dr Monica Craciun said: ��GraphExeter could revolutionise the electronics industry. It outperforms any other carbon-based transparent conductor used in electronics and could be used for a range of applications, from solar panels to ��smart�� teeshirts. We are very excited about the potential of this material and look forward to seeing where it can take the electronics industry in the future.�� More information: http://onlinelibra �� 489/abstract
C:\Documents and Settings\xihang\Application Data �����������Զ��������صĶ�������������Զ��������������������Ҳ������ļ�����Ѱ�ҡ� ��������ļ�����Ķ���������ɾ���ģ���ɾ���˿��ܻ�Ӱ��ϵͳ���С���ҿ���������Щ�dz����ļ�������û��ʲô��������caches֮����ļ�ɾ���˾�û�����⡣ ����Apple Computer�ļ��о��� Apple Computer����2.5G��Ĵ洢�� 1������itunes�������µ�ipod�̼�������Ҫ��ɾ���� 2��MobileSync������backup����ÿ��backup�������ţ��ҰѲ���Ҫ�Ķ�ɾ���ˡ� C:\WINDOWS �����������$NtUninstallKB898461$���ļ�������ɾ��������ǰ�װ�����ķ���װ����һ���Ҷ�����Ҫж�ذ�װ�IJ��������Կ���ɾ���� $hf_mig$�ǰ�װ�����ı����ļ���Ҳ����ɾ���� C:\Documents and Settings\xihang\Local Settings �����Temp��Temporary Internet Files�ļ�����Ķ�������ɾ��������һ����Щ���ᱻϵͳ��������ɾ������
�� windows �д��� R ���������ָ�� �� Windows ��������α�д R �������Ҳ�������ɹ� linux �����������е� tar.gz �ļ���Ҳ���ɹ� windows ��ʹ�õ� .zip �ļ�����һ���̲������ӣ���Ҫ����һЩ����������������Ӧ�IJ�����д��Ӧ�� �� ���� �� ���̶��ڿ���̨������һЩָ�������� R ���û���������Щ��Ӧ��İ���ˡ� �� Windows �±�д R �����ͨ���������¼����� �� 1 ���������� Rtools �İ�װ�ͱ�ѡ�����İ�װ�� �� 2 �� r �ű�������Ҳ�����������ɳ�����ĺ����ű��� �� 3 ������ R ���Դ��� package.skeleton() ��������������������Ҫ�� Description �ļ��Ͱ����ļ� .rd �� �� 4 ����Ҫ����д���ɵ� Description �ļ��Ͱ����ļ� .rd �� 5 ���� windows cmd ����������������Ӧ��������� zip �ļ����� .tar.gz, ��������Ӧ�ļ�顣 �����������������һ�� R �����������ֻ����һ�������� һ ����������װ������ ���� r ���Ĺ����������� Rtools �� MikTeX �� Ctex ( ��������� pdf �ֲᣬ����Ҫ��װ ) 1 ����������װ �� 1 �� Rtools ������ R ������Ҫ���ߣ� Rtools ���� windows ������ R ����һϵ�й��ߣ����а��� 1 �� CYGWIN �� Windows ��ģ�� UNIX ���� 2 �� MinGW ������������������ C �� Fortran ���ԡ� 3 �� Perl ���ص�ַ�� http://www.murdoch-sutherland.com/Rtools/ �� 2 �� MikTeX �� CteX ����ѡ�� �������� PDF ��ʽ�İ����ļ� ���ص�ַ�� http://www.miktex.org/ www.ctex.org/ �ֱ���Ҫ��װ�á� 2 �����ļ�����·���� ��������·����Ŀ������ cmd �����п���ֱ�ӵ��� Rtools ����Ӧ������ �Ҽ������ �ҵĵ��� ���� �� �������� ϵͳ���� PATH һ���� �� �༭ �� ������Ƿ��������·����ͨ�������ڰ�װʱ�Ѿ��Զ����ú�������·�������û�У���Ҫ�ֹ����ӣ� c:\Rtools\bin;c:\Rtools\perl\bin;c:\Rtools\MinGW\bin; C:\CTEX\MiKTeX\miktex\bin;C:\CTEX\CTeX\ctex\bin;C:\CTEX\CTeX\cct\bin;C:\CTEX\CTeX\ty\bin; C:\Program Files\R\R-2.15.0\bin\; ͼ 1 ��������·�� �� R �ű����� �������������Ѿ�����һ����õ� R ���� freq �������������ֳ��ֵ����Ƶ�� , ����� r �ű��ĸ�ʽ , �ļ���Ϊ freq .r ������������ʾ ############################################## freq - function(matr) { matr - as.matrix(matr) if(!is.matrix(matr)) { stop("The input data must be matrix!\n") } if(any(is.na(matr))) { matr - na.omit(matr) print(paste("NA found in matrix, and have been removed\n")) } matr - 1 result - apply(matr, 2, sum)/nrow(matr) return(result) } ############################################## �������� R �Դ��� package.skeletons() �������� R ������Ŀ�� �� R ����ܵ��� 1 �������ļ� ��½ R ����ʼ ���г��� RR.2.15.0 (1) ����ڴ��еĶ���Ŀ��ɾ�� R �ڴ������в���Ҫ�����ݻ����� rm(list=ls()) (2) �趨����Ŀ¼�������趨Ϊ c:/pa setwd("c:/pa") (3) ���� source() ������ r �ű��еĺ�����ȡ�� ���Ҫ������ R �����кܶຯ���������Ƚ�����������һ���ű��ļ������� source() ������ȡ�ýű��еĸ�������������Ҫ�����ݶ�ȡ���ڴ��С��� package.skeleton �� name="packname", list = ls() ��������Ӧ�İ���ܡ� �������Ҫ����һ����Ϊ freq �� R ����������������� package.skeleton(name="freq", list = ls()) ��ʱ�� R ����̨����ʾ package.skeleton(name="freq", list = ls()) Creating directories ... Creating DESCRIPTION ... Creating Read-and-delete-me ... Saving functions and data ... Making help files ... Done. Further steps are described in './freq/Read-and-delete-me'. ���Կ��� c:/pa �ļ������³�����һ�� freq �ļ��� ���ļ����µ����ݾ��� R ���Ŀ�ܣ����� Read-and-delete-me �� DESCRIPTION �ļ��� r �ļ��У� man �ļ��У�ֻҪ��Ҫ������д�������ٽ�����Ӧ�ı��뼴�ɡ� Read-and-delete-me ������δ��� R �� DESCRIPTION �Ƕ� R ���ļ�Ҫ���� r �ļ����д�ŵ��� .r �ļ�������������Դ���� man �ļ����´�ŵ��� Rd �ļ���Ҳ���� R ������Դ���� ���Ȳ鿴 Read-and-delete-me �ļ� �ļ��������£� #################################################################################### * Edit the help file skeletons in 'man', possibly combining help files for multiple functions. * Put any C/C++/Fortran code in 'src'. * If you have compiled code, add a .First.lib() function in 'R' to load the shared library. * Run R CMD build to build the package tarball. * Run R CMD check to check the package tarball. Read "Writing R Extensions" for more information. #################################################################################### ������˼���£� ���� man �ļ����±༭�����ļ� C/C++/Fortran ��Դ����Ӧ�÷��� src �ļ����� ��Ҫ�ڵ�¼ʱ����� �������� R CMD �����ͼ����Ӧ�İ� ע������� R CMD ˵������ Linux ���ն���������ʵ������ Windows ������Ӧ������ Rcmd Rcmd build packname ��Դ�������� Rcmd build --binary packname ���� zip ���� Rcmd check packname ��������Ĵ��� �鿴�����ļ�֮����Ҫ����ɾ���� 2 �༭ Description �ļ��� rd �ļ� �� 1 �� Description �ļ��ı༭ ������ʾ����ø��� Description �ļ��Ǹó�����ļ�飬��һ��ʽ�� Debian Linux �����߷����ġ� �������£� ��ɫ��������Ҫ�ֹ��༭�ġ� ��Ҫ�ر�ע����ǣ����������������ʹ���� vegan ����������ݣ���Ӧ���� Description �ļ��м��� Suggests �� vegan, ������ Rcmd check �н�����ͨ���� ���������е� R �������� vegan ������ĺ���������Ҫ�� Description �ļ��м��� Depends:vegan �����ڸó�����������ͬʱ����֤ vegan �����Ҳ�����롣 #################################### Package: freq Type: Package Title: Calculate relative frequency Version: 1.0 Date: 2010-05-20 Author: Jinlong Zhang Maintainer: Jinlong Zhang Description: Calculate relative frequency for species matrix. License: GPL-2 LazyLoad: yes Suggests: vegan ##################################### �� 2 �� man �ļ����� .rd �ļ��༭ man �ļ����а��������ļ� freq.Rd �� freq-package.Rd ���ֱ��Ƕ� freq() ������ freq ���Ľ��ܣ�����������д : Rd �ļ��ĸ�ʽ�� Tex �ĸ�ʽ��������� LaTex �Ļ��������������������û�У�����Ҫ��ϸ��ĥһ���ˡ� Rd �ļ�����Ŀ�в������գ������ڼ��ʱ����ʾ���档���� title �DZ�����д�����ݡ�ͬʱҪע�� �� �� Rd �ļ��� �� ��Ҫ���ַ� ASCII ���ַ� �� ������ Rcmd check �н�����ͨ���� freq.Rd �ļ����ݣ���ɫ��Ϊ�ֹ�����IJ��֣�ԭ�ļ��� % ���Ϊע�ͣ����Ժ��� ################################################################# \name{freq} \alias{freq} \title{ Species relative frequency } \description{ This function calculates the species relative frequency which equals to the numbers of occupied plots partitioned by the total number of plots for each species. } \usage{ freq.calc(matr) } \arguments{ \item{matr}{ The standard species matrix } } \details{ The input data is a standard species matrix with rows for plots and column for species. } \value{ Returns a vector that contains relative frequency for each species included in the input matrix. } \references{ None } \author{ Jinlong Zhang \email{jinlongzhang01@gmail.com} } \examples{ library(vegan) data(BCI) freq(BCI) } \keyword{ frequency } \keyword{ species } ###################################################################### freq-package.Rd �а����ļ������ freq.Rd �����ơ� �� ͨ�� cmd ���� R �� �� Windows ��ʼ ���� cmd ���� cd/dc:\pa\ ������Ŀ¼ת�Ƶ� c:/pa ��(win 7��/d����) ���� Rcmd build --binary freq ���� windows zip �� ���� Rcmd build freq ���� linux ƽ̨�¿����е� tar.gz �� ����������֮����Է��֣��� c:/pa/ �ļ����·ֱ������� freq.zip �� freq_1.0.tar.gz ѹ������ ���� Rcmd check freq �� freq_1.0.tar.gz ����ĸ������ݽ��м�顣 ���� Rcmd Rd2pdf freq ���� pdf ��ʽ�������ֲᡣ ͼ 4 �� cmd ������ Rcmd build freq �������Ӧ�� tar.gz ����� �������ϣ�����Լ������� Package �ϴ��� CRAN �������Ҫͨ�� Rcmd check ���������в������κδ���档 �ο���ַ http://www.robjhyndman.com/researchtips/building-r-packages-for-windows http://cran.r-project.org/doc/contrib/Leisch-CreatingPackages.pdf http://www.biostat.uni-hannover.de/teaching/fallstudien/schaarschmidt2.pdf
�����������ʾ:ѡ��Ҫ�����IJ���ϵͳ��: Microsoft windows xp Professional Ghost ������ һ��GHOST V2010.01.02 Windows(Ĭ��ֵ) �ҵĵ���-����-��-"����������"����-ѡ��Ĭ�ϲ���ϵͳ-Ȼ���"��ʾ����ϵͳ�б�ʱ��"��"����Ҫʱ��ʾ�ָ�ѡ���ʱ��"������ǰ�淽���ڵĹ������ Ҳ���Ը���C�����boot.ini�ļ� �����ļ� OK
�����Windows xp �ļ�����Ĭ��Ϊ����ϸ��Ϣ�������ʽ Windows XPĬ����ƽ�̵��ļ���չʾ��ʽ���ҵ������ļ���һ�㶼�ܳ���ϲ������ϸ��Ϣ��ʽ���������˵ÿ���ļ��ж���һ��̫�鷳�ˡ� 1��������һ���ļ��У�ѡ��˵������鿴���С���ϸ��Ϣ��һ������á�ѡ����ϸ��Ϣ�����Լ���Ҫ����ϸ��Ϣ�� 2���˵����С����ߡ�-���ļ���ѡ���ѡ�鿴��-��Ӧ�õ������ļ��С����ٴ������ļ���Ҳ������ͬ���ġ���ϸ��Ϣ���á�����ʾЧ���ˡ�
�ҵ�Windowsϵͳ��һ����c�̣���������c���ж����ϵͳ������ʾ��c�̴��̿ռ�͡������������ʾ���ǻ�����������ȥ�ܣ�����һ������ʱ���Ծͱ���ţ������ʲô�������ˣ�����ֻ��ȥ����������������Ҫ֪�����ʱ���ʲô�ʹ����йص��¶�������ģ����Ծ͵Ȱɡ� ��������������ҳ��Թ����ְ취�������������ǰ���������װ��������̡�����һ��ʱ�䣬����15G��c����ijһ�컹�Dz��ɱ�������ˡ����о���һ��ʱ�䣬����outlook express�ڸ�����Ұ��ռ���Ų����������̡����ǡ���c�̻��Dz��ɱ�������ˡ���ε�����Դ��ˡ� ��������һЩ������˵������ʱ�ļ�̫�ࡣ���ڽ������������˵�ô�������������Ȼ�Dz��еģ�Ҫ����Ҳ�������о�����ˣ�������˵�ֶ�ȥɾ��������ȻҲ�Dz��еģ���������ţ��ʱ����ò�Ҫ�ô��ڣ�������˵��ֱ�������б���ɾ���������Linux�µľ��飬�Ҿ������һ�ֿ��ף���ȻҲ���൱��Σ�ա�����Linux�����������ɾ�����Լ�����Ŀ¼�� ���Ͼ����ֳɵ����ֱ���ɾ���ű�����Ȼ�ڸ�����֮ǰ�������ã���Ҫ��Ҫ���ű���ɾ�����ļ�����ʲô���塣�ű����һ��ɾ������.tmp��β����ʱ�ļ��� del /f /s /q %systemdrive%\*.tmp ����/f��ʾǿ��ɾ��ֻ���ļ���/s��ʾ����Ŀ¼��ɾ�����൱��Linux�ġ�-r����recursive ����/q��ʾ����ģʽ��ɾ��ȫ��ͨ�������ȷ�ϣ���������������ֱ������һ�£���һ������Ϳ����ͷ�1G�Ŀռ䡣���ǻ���һ����������Ǻ�Σ�յģ���Ϊ���ҵļ����ϡ�\�����ͻس�����һ�������������%systemdrive%��ʱ���Һ��п�������һ�»س���Ȼ����ܾͱȽϱ����ˡ����Ի��ǰ���Щ����д��һ��.bat�ļ���Ƚϰ�ȫ��ȷ��������ȷ�Ժ���ִ����������ע���ű���ע����rem�������Linux�ĸ����ࣩܶ�� ����ɾ���ű���������ɾ����._mp��β����ʱ�ļ���.log��β����־�ļ���.gid��β����ʱ�����ļ���.chk��β�Ĵ��̼���ļ���.old��β����ʱ�����ļ��Լ�����һЩ�ļ����������뵽��Ϊֹ�Ѿ����������ҵ���Ҫ�ˡ��´��١�c�̴��̿ռ�͡�����취�������ҵ�release.bat�������� rem anti c space is low echo start cleaning del /f /s /q %systemdrive%\*.tmp del /f /s /q %systemdrive%\*._mp del /f /s /q %systemdrive%\*.gid del /f /s /q %systemdrive%\*.old del /f /s /q %systemdrive%\recycled\*.* del /f /s /q %windir%\prefetch\*.* echo done ִ�е�ʱ���cmd�����д��ڣ��� release �Ϳ����ˡ� 20140110 ����������ѧ��һ�У���CCleaner�� http://www.piriform.com/ccleaner/download/portable
Remote Access with VNC On the Windows computer you will be using from outside the center: • 1. Download putty.exe from here . • 2. Download Ultr@VNC Standalone Viewer . 3. Open Putty and open a connection to Host Name gate.nmr.mgh.harvard.edu 4. From gate ssh to your linux workstation. (In this example user 'mehlsa' is connecting to a workstation named 'crusoe') 5. Once connected to your workstation, run the command /usr/pubsw/bin/vncpasswd . Enter and confirm a password that you will use to connect remotely. 6. Run the command /usr/pubsw/bin/vncserver.glx 7. You must note the number value that is returned for your remote desktop. In this example the value is 1 . You do not normally need to run steps 5-7 every time you connect. Unless your workstation has rebooted or you have explicitly killed your VNC server process, the vncserver.glx program will still be running. After connecting to your workstation run /usr/pubsw/bin/vnccheck to see see if the process is still running. This will also show you the desktop number (the number after the colon) you need for the tunnel. • 8. Open a new putty window. • 9. Enter gate.nmr.mgh.harvard.edu for the Host Name and enter gate_vnc for the Saved Sessions. • 10. In the category menu on the left, click on "Tunnels" • 11. Enter a Source port of 5905 . • 12. For the Destination, you should enter the name of the linux workstation that is running vncserver.glx followed by a colon and 590X where "X" is the number you noted in step #7 above. . (In this example, we are attempting to create a tunnel to the destination crusoe:5901 ). • 13. You must click the 'Add' button. • 14. In the category menu on the left, click on "Session" • 15. Click the 'Save' button to save all the changes you've made. • 16. Now double-click on ' gate_vnc ' to open a terminal window. • 17. Login using your NMR username and password. Once you have logged in, you can minimize the window. As long as the window remains open, the tunnel will exist and you will be able to use VNC. • 18. Open. UltraVNC Viewer. • 19. You must enter localhost:5905 as the Server. Then press Connect. • 20. Use the password you set in step #5 to connect. • 21. Once connected, you can click on the icon in the upper-left hand corner of the screen to display a menu with some commonly uses commands.
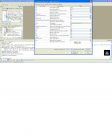
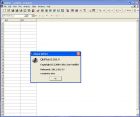
S-PLUS for Windows - version 4.5 http://mercury.bio.uaf.edu/mercury/splus/splus.html#first 303 Irving S-PLUS is a powerful computing tool that combines the usefulness of a statistical analysis package with that of a publication quality graphics package and a matrix-based programming language. It's easy enough to use for quick and simple tasks, yet powerful enough for the most demanding ones. The goal of this demonstration is to provide a basic introduction to using S-PLUS. An S-PLUS session differs from that of other statistical software. You will find it to be an interactive approach where the results from one step lead to the next. This introduction to S-PLUS is necessarily limited in scope to only a handful of analyses. Once you become familiar with S-PLUS and browse through some of the online help topics, you will discover tools for practically any type of analysis you need. The basic S-PLUS module allows for time series, survival, and multivariate analyses, among others. Topics included in this tutorial: 1. Starting S-PLUS the first time 2. Some things to keep in mind 3. Beginning an analysis 4. Visualizing your data 5. Simple Linear Regression 6. Non-linear Regression 7. Polynomial Regression 8. Writing functions 9. What to do next Return to Mercury Home Page 1. Starting S-PLUS the first time ( Back to Top ) The first time you run S-PLUS from the computer lab, you will be asked for a directory where your work will be saved. S-PLUS will use this for a working directory whenever you start a session, however, you can easily change to another directory at any time. So before you start S-PLUS, decide on your default working directory and, if necessary, create it. Then when you start S-PLUS and it asks you for a start-up directory, click on "Browse" and proceed to select the desired directory. When you click "OK", S-PLUS will create the necessary subdirectories that it needs (_Data and _Prefs) and start the application. When S-PLUS opens, you will most likely see a dialog box to Select Data. Just click "Cancel" for now. After that, there may or may not be any open windows. You will want a Commands Window so the first thing to do is open one up if it isn't open already. From the Window menu, select Commands Window. Alternatively, you can click on the Commands Window button on the toolbar. Another useful window to have open is the Object Browser. Open this by clicking on the Object Browser button on the toolbar. You can set up your preferences so that both of these windows open when you start an S-PLUS session. From the Options menu, select General Settings, and then select the Startup tab. On the left hand side you will see a group of three items that you can Open at Startup. Check Command Line and Object Browser. You can also uncheck Select Data Dialog if you don't want that coming up every time. 2. Some things to keep in mind ( Back to Top ) Everything in S-PLUS is some kind of object. Objects can have different modes (numeric, character, list, function, etc.) with different structures (scalar, vector, matrix, etc.) and different classes (data frame, linear models result, etc.). Almost every command you execute in S-PLUS uses one or more functions. Functions are called by their name followed by a set of parentheses. If any arguments are passed to the function, they are listed within the parentheses. The parentheses must always be present whether or not there are any arguments. For example, to get a listing of all the objects in your working directory, you would use objects() . If you wanted a list of objects in another directory in your search path, you might use objects(where=3) . Use the assignment operator to create objects. The assignment operator is the "less than" symbol followed by a hyphen ( - ) or the underscore ( _ ). For example, to create an object called tmp and assign it the value 3, you would enter tmp - 3 or tmp_3 . The equal sign (=) is used almost exclusively for passing arguments to functions, like the last command in comment b above. S-PLUS is case sensitive. Keep that in mind when you're naming objects or calling functions. We could create another object called Tmp that would be separate and distinct from tmp . If you already have an object with the name tmp and you assign something else to an object with that name, then the first object is overwritten. Be careful not to lose something you want to keep. Once you've created objects, you may want to get rid of them later . Use the function rm() with the object names as arguments. For example, rm(tmp) . You can recall previous commands with the up-arrow and down-arrow keys. Once you've located the command you want, you can hit enter to execute the command as is, or you can edit the line first. This can save time, especially with complicated commands. Open a graphics window with the function graphsheet() . Make use of the online help. Go to the help index and look up graphsheet. You'll find a description of all possible arguments that can be used, a full discussion on its use, and some examples of how it can be used. If you just need a reminder of what arguments can be passed to a particular function, use the args() function with the function name in the parentheses. For example, try args(graphsheet) to see what arguments can be used with that function and what default values they may have. In the examples that follow, pay very close attention to all associated punctuation. Things like commas and parentheses are absolutely critical to S-PLUS understanding what you want to do. If you get an error after executing a command, the first thing to do is check the syntax. That is the cause of most errors. S-PLUS almost always ignores spaces, so whether you type tmp_c(1,2,3) or tmp _ c ( 1, 2, 3) , you get the same result. The Escape key serves as your abort button. If something goes wrong or you're suddenly seeing an endless array of numbers scrolling by, you can hit the Escape key to quit whatever you're doing and get you back to the command prompt. This does not kick you out of S-PLUS altogether�� More interesting following: http://mercury.bio.uaf.edu/mercury/splus/splus.html#first
Now close the windows Robert Frost Now close the windows and hush all the fields: ���ھ��ϴ��ӣ�����Χ���� If the trees must, let them silently toss; �������Ҳ���農��������������������ҡ No bird is singing now, and if there is, ��������Ҳ���ٸ質������������������� Be it my loss. ��ô�����ҵ�ʧ�����»��� It will be long ere the marshes resume, �ҵ�ʧ���������ʪ���γ�֮ǰ It will be long ere the earliest bird: ������������Щ���ϵ�������� So close the windows and not hear the wind,��˹��ϴ��Ӱɣ���Ҫ�����Ƿ��� But see all wind-stirred. �������DZ�������ڿ���
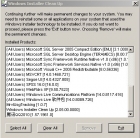
.NET Framework������Windows�����йܴ�����ģ�͡���ǿ�������¼���������������ڹ��������Ӿ�������עĿ���û������ Ӧ�ó��� ��ʵ�ֿ缼���߽����ͨ�ţ�������֧�ָ���ҵ�����̡� �����˵���ò�����������������������ʵ�ýϴ�������������˵���ǵij��õ�mapgis���ο���������˵�����õĿ�����cad�ȵ��ر���һЩ������Ϸ���û����������ϾͰ�װ����װ���ˣ����㳬�����ƣ����������ȴ������ô���ȶ��� XP��ϵͳ��װ�ú���������������� .NET framework2.0��ж��,����װ,���� ��2003��Ҳ�����֣�����������ϵͳ���Ҳ���ж��.net2.0 3.0��ɾ�������ֶ�ɾ������ע�����ûɾ������ɸ���Ĵ���ͬʱ����һ�������Ƶ�������dz��õ�ǿ��ж��������������ж�����������������Ҿ��Ƽ�����һ����д��С�������ܺ��õ� ������ת�����ߵ�˵�� ---------------------------------------------------�����ķֽ���-------------------------------------------------------- ��NET Framework Cleanup Tool User's Guide Introduction This .NET Framework cleanup tool is designed to automatically perform a set of steps to remove selected versions of the .NET Framework from a computer. It will remove files, directories, registry keys and values and Windows Installer product registration information for the .NET Framework. The tool is intended primarily to return your system to a known (relatively clean) state in case you are encountering .NET Framework installation, uninstallation, repair or patching errors so that you can try to install again. There are a couple of very important caveats that you should review before using this tool to remove any version of the .NET Framework from your system: This tool is designed as a last resort for cases where install, uninstall, repair or patch installation did not succeed for unusual reasons. It is not a substitute for the standard uninstall procedure. You should try the steps listed in this blog post before using this cleanup tool. This cleanup tool will delete shared files and registry keys used by other versions of the .NET Framework. If you run the cleanup tool, you will need to perform a repair/re-install for all other versions of the .NET Framework that are on your computer or they will not work correctly afterwards. Download location The .NET Framework cleanup tool is available for download at the following locations: ����վ���ص�ַ�� dotnetfx_cleanup_tool.zip http://u.115.com/file/f263f0bc14 ����վ�������ӣ� The .zip file that contains the tool also contains a file named history.txt that lists when the most recent version of the tool was published and what changes have been made to the tool over time. Supported products The .NET Framework cleanup tool supports removing the following products: .NET Framework - All Versions .NET Framework - All Versions (Tablet PC and Media Center) .NET Framework - All Versions (Windows Server 2003) .NET Framework - All Versions (Windows Vista and Windows Server 2008) .NET Framework 1.0 .NET Framework 1.1 .NET Framework 2.0 .NET Framework 3.0 .NET Framework 3.5 .NET Framework 4 Not all of the above products will appear in the UI for the .NET Framework cleanup tool on every operating system. The cleanup tool contains logic so that if it is run on an OS version that includes the .NET Framework as an OS component, it will not offer the option to clean it up. This means that running the cleanup tool on Windows XP Media Center Edition or Tablet PC Edition will not offer the option to clean up the .NET Framework 1.0, running it on Windows Server 2003 will not offer the option to clean up the .NET Framework 1.1 and running it on Windows Vista or Windows Server 2008 will not offer the option to clean up the .NET Framework 2.0 or the .NET Framework 3.0. When choosing to remove any of the above versions of the .NET Framework, the cleanup tool will also remove any associated hotfixes and service packs. You do not need to run any separate steps to remove the service pack(s) for a version of the .NET Framework. Silentinstallation mode The .NET Framework cleanup tool supports running in silent mode. In this mode, the tool will run without showing any UI, and the user must pass in a version of the .NET Framework to remove as a command line parameter. To run the cleanup tool in silent mode , you need to download the cleanup tool, extract the file cleanup_tool.exe from the zip file, and then run it using syntax like the following: cleanup_tool.exe /q:a /c:"cleanup.exe /p name of product to remove" The value that you pass with the /p switch to replace name of product to remove in this example must exactly match one of the products listed in the Supported products section above. For example, if you would like to run the cleanup tool in silent mode and remove the .NET Framework 1.1, you would use a command line like the following: cleanup_tool.exe /q:a /c:"cleanup.exe /p .NET Framework 1.1" One important note �C as indicated above, the cleanup tool will not allow you to remove a version of the .NET Framework that is installed as part of the OS it is running on. That means that even if you try this example command line on Windows Server 2003, the tool will exit with a failure return code and not allow you to remove the .NET Framework 1.1 because it is a part of that OS. Similarly, you cannot use the cleanup tool to remove the .NET Framework 1.0 from Windows XP Media Center Edition or Windows XP Tablet PC Edition or remove the .NET Framework 2.0 or 3.0 from Windows Vista or Windows Server 2008. In addition, if you run the cleanup tool on an OS that has any edition of the .NET Framework installed as a part of the OS, it will prevent you from using the .NET Framework - All Versions option because there is at least one version that it cannot remove. If you are planning to run the cleanup tool in silent mode, you need to make sure to detect what OS it is running on and not pass in a version of the .NET Framework with the /p switch that is a part of the OS or make sure that you know how to handle the failure exit code that you will get back from the cleanup tool in that type of scenario. Unattended installation mode The .NET Framework cleanup tool supports running in silent mode. In this mode, the tool will run and only show a progress dialog during removal, but will require no user interaction. Unattended mode requires the user to pass in a version of the .NET Framework to remove as a command line parameter. To run the cleanup tool in unattended mode , you need to download the cleanup tool, extract the file cleanup_tool.exe from the zip file, and then run it using syntax like the following: cleanup_tool.exe /q:a /c:"cleanup.exe /p name of product to remove /u" For example, if you would like to run the cleanup tool in unattended mode and remove the .NET Framework 1.1, you would use a command line like the following: cleanup_tool.exe /q:a /c:"cleanup.exe /p .NET Framework 1.1 /u" Exit codes The cleanup tool can returns the following exit codes: 0 - cleanup completed successfully for the specified product 3010 - cleanup completed successfully for the specified product and a reboot is required to complete the cleanup process 1 - cleanup tool requires administrative privileges on the machine 2 - the required file cleanup.ini was not found in the same path as cleanup.exe 3 - a product name was passed in that cannot be removed because it is a part of the OS on the system that the cleanup tool is running on 4 - a product name was passed in that does not exist in cleanup.ini 100 - cleanup was able to start but failed during the cleanup process 1602 - cleanup was cancelled Log files The cleanup tool creates the following log files: %temp%\cleanup_main.log - a log of all activity during each run of the cleanup tool; this is a superset of the logs listed below as well as some additional information %temp%\cleanup_actions.log - a log of actions taken during removal of each product; it will list files that it finds and removes, product codes it tries to remove, registry entries it tries to remove, etc. %temp%\cleanup_errors.log - a log of errors and warnings encountered during each run of the cleanup tool
����������ʽ���Ƕ��о�WSN/DSNЭ�飬��ʽ�����DZز����ٵĹ��ߣ�����ʽ������Functional Languages��ϵ���У���������2��ʱ��ѧϰһ��SML���������ޣ�OSΪWindows���������L.C.Paulson��ML for the Working Programmer��,���İ��ǿ�Τ��ġ�ML������ƽ̡̳���������ΪSML/NJ���Ժ�ɼ�װDebain Linux���滳����ԭ�����õ�Debain 5.0ϵͳ�� 1����α���SML�ļ��� notes-011001.pdf A��SML�������������뷽ʽ���ù���C��Gnu Linux / Windows�����ز���ӦSML�����ʽ����Ҫ�Dz����ڵ��ԡ�ֻ�ö���ָ�ϣ������з������룺 ���ԡ�Notes on Programming Standard ML of New Jersey��һ�飺 ����foo.sml �ļ�: fun double (x:int):int = 2 * x; fun square (x:int):int = x * x; fun power (x:int,y:int):int = if (y=0) then 1 else x * power (x,y-1); ��ȡ��ǰ����Ŀ¼: OS.FileSys.getDir: - OS.FileSys.getDir (); �� - OS.FileSys.chDir /home/riccardo/work/sml; ����: foo.sml��C�� ���� - OS.FileSys.chDir C:\\; - use foo.sml; sml-tutorial.pdf Standard ML http://en.wikipedia.org/wiki/Standard_ML#References Alice ML: http://www.ps.uni-saarland.de/alice/
Building as a Standalone ApplicationCreate a batch file which sets the following environment variables: A3DT, ARCH, and PATH. An example of such a batch file is shown below: Choose from the two options below Option 1: Open the Visual Studio 2005 Command Prompt window by selecting: StartAll ProgramsMicrosoft Visual Studio 2005Visual Studio ToolsVisual Studio 2005 Command Prompt .Drop the batch file created in the previous step into the command window and select Enter . Option 2: Add the following line to the batch file created in Step 1:C:\Program Files\Microsoft Visual Studio 8\VC\bin\vcvars32.bat. An example of such a batch file is shown below and follow the next steps. Select Start in the lower left corner of your screen.Select Run ; this opens a new Run window:Typecmdin the window as shown below: Drag and drop the batch file created using the above steps in the newly launched command window.Choose Enter . This runs the batch file and sets the required paths needed to build an ACIS-based console application.Typedevenvin the command window.Select FileNewProject or enter Ctrl+Shift+NSelect Win32 from the Visual C++ Option and Win32 Console Application from Templates; enter an appropriate name and location, and then select OK . This creates a stock project: for example,MyfirstAcisProject The Win32 Application Wizard pops up; select Next .From the menu Application Settings Application , select "Console application". From Additional options , select "Empty project". Finally, select Finish .Under Project , select Add New Item�� .In the Add New Item window, select Code for the category.Choose C++ file (.cpp) as the template to use. Provide the desired name and location.Select Add .Next, setup the project settings. Open the Property Pages by selecting the project name under the Solution Explorer. Enter Alt-F7 or right click and select "Properties". The following image is a sample Project Properties screen. Note: Make certain that this is the properties screen for the project and not an item in the project. Now expand the Configuration Properties and select C/C++ from the resulting list.Select the Configuration Manager button and set the Active Solution configuration as follows and then select Close .Release (if ARCH=NT_VC8_DLL)Debug (if ARCH=NT_VC8_DLLD)Expand the C/C++ list and select General and enter $(A3DT)/include in the "Additional Include Directories" field.Next select the "Preprocessor" option from the C/C++ tree and append NT_VC8_DLL(or NT_VC8_DLLD), ACIS_DLL, SPA_NO_AUTO_LINK.Expand the "linker" tree and select the General option and enter $(A3DT)/lib/$(ARCH) in the "Additional Library Directories" field.Next select the Input option and enter the following libraries in the "Additional Dependencies" field: SPAAcis.lib SpaLicErrGUI.lib.Select Apply , then OK .Copy the code sample below into the CPP file.Select Build/Rebuild Solution (Ctrl+Alt+F7) .Your program is ready to use. Make certain to add the license key to begin making calls to the ACIS functions.Code to Copy into CPP File Code to Copy into CPP File for Building as a Standalone Application Licensing Headers The following code is the licensing header and sample ACIS calls. #include "license.hxx" #include "spa_unlock_result.hxx" #include "spa_lic_err_gui.hxx" Sample ACIS calls to create a sphere and then to write it into a SAT file: #include "position.hxx" #include "body.hxx" #include "cstrapi.hxx" // SAMPLE // Create an Entity List to add entities ENTITY_LIST entityList; // Create Sphere // BODY* sphere = NULL; api_solid_sphere(SPAposition(30, 30, 30), 10, sphere,NULL); entityList.add(sphere); // Create sat File // create_sat_file (entityList, "MyFirstAcisProject.sat"); // End SAMPLE
GMT − The Generic Mapping Tools data processing and display software package GMT is a collection of public-domain Unix tools that allows you to manipulate x,y and x,y,z data sets (filtering, trend fitting, gridding, projecting, etc.) and produce PostScript illustrations ranging from simple x-y plots, via contour maps, to artificially illuminated surfaces and 3-D perspective views in black/white or full color. Linear, log10, and power scaling is supported in addition to 25 common map projections. The processing and display routines within GMT are completely general and will handle any (x,y) or (x,y,z) data as input.Significantly improved versions (3.1-3.3, 3.3.1-6), 3.4, 3.4.1-5, and 4.0-4.5.3 were released between November 1998 and July 2010, culminating in the Mar 2011 introduction of 4.5.6. GMT now is used by 15,000 users worldwide in a broad range of disciplines. The homepage of GMT is http://www.soest.hawaii.edu/gmt/ The installation for windowsis as follows: Reprint from the website 1.���ļ����� (�ļ�������ַ:http://gmt.soest.hawaii.edu/) netcdf-4.1.1 GMT_basic_install.exe GMT_pdf_install.exe GSHHS_highfull_install.exe 2.ִ�а�װ�����ļ� ����װ��D��Ϊ���� GMT_basic_install.exe GMT_pdf_install.exe GSHHS_highfull_install.exe ��ʱ����D:\GMTĿ¼�²����������ļ��У�bin include lib share 3.��netcdf-4.1.1�ļ�����D:\GMTĿ¼�� ����ѹnetcdf ����ļ��� 4.��D:\GMT\share������ *.d; *.cdf; *.ps �ļ���conf�ļ����µ������ļ�����D:\GMTĿ¼�� 5.��D:\GMTĿ¼�´���gmt.bat�ļ� Ŀ�ģ�����GMTHOME��HOME �� NETCDF,��PATH��LIB��INCLUDE������gmt.bat�ļ�������,����������,����Ϊgmt.bat, Ȼ������Լ�����������ģ����������洴����Ŀ¼Ϊ���� gmt.bat�ļ����������£� ECHO OFF REM ---------------------------------------------------- REM REM @(#)gmtenv.bat 1.10 03/08/00 REM REM Copyright (c) 1991-2000 by P. Wessel and W. H. F. Smith REM See COPYING file for copying and redistribution conditions. REM REM This program is free software; you can redistribute it and/or modify REM it under the terms of the GNU General Public License as published by REM the Free Software Foundation; version 2 of the License. REM REM This program is distributed in the hope that it will be useful, REM but WITHOUT ANY WARRANTY; without even the implied warranty of REM MERCHANTABILITY or FITNESS FOR A PARTICULAR PURPOSE. See the REM GNU General Public License for more details. REM REM Contact info: www.soest.hawaii.edu/gmt REM -------------------------------------------------------------------- REM REM Sets the GMT environment needed under WinXP. REM REM Author: Paul Wessel, 07-MAR-2000 REM REM ---------------------------------------------------- REM Set NETCDF, GMTHOME, and HOME: REM ---------------------------------------------------- SET NETCDF=d:\GMT\netcdf-4.1.1 SET GMTHOME=d:\GMT SET HOME=d:\GMT REM ---------------------------------------------------- REM Must set INCLUDE and LIB if GMT source is to be used REM OR compiled. If not, REM these lines out. REM ---------------------------------------------------- SET INCLUDE=%INCLUDE%;%NETCDF%\INCLUDE SET LIB=%LIB%;%NETCDF%\LIB;%GMTHOME%\LIB REM ---------------------------------------------------- REM STOP HERE, Now appending to PATH: REM ---------------------------------------------------- SET PATH=%PATH%;%GMTHOME%\BIN;%NETCDF%\LIB REM ---------------------------------------------------- ECHO GMT 4.5.2 Environment initialized doskey 6.����DOS����DOS�½���D:\GMTִ��gmt.bat����ʾ���£� D:\GMTgmt.bat D:\GMTECHO OFF GMT 4.5.2 Environment initialized ��ʱ������һ������psxy�Ƚ��в��ԣ�������ִ������˵�������ʾ�ɹ��ˡ� 7.����gawkҲ��window�³��ó���,������������վ���� http://gnuwin32.sourceforge.net/packages/gawk.htm ���غ�,��װ��D:\GMT Ŀ¼��(����װ���κ�Ŀ¼��)��ֻҪ��D:\GMT\GnuWin32\bin����������ļ������� D:\GMT\bin �¾Ϳ����ˡ� 8.PS�鿴��ghostview�İ�װ �ڰ�װGhostviewǰ�Ȱ�װGhostscript�������������������������ɻ�ȡ http://pages.cs.wisc.edu/~ghost/ ���Ⱥ�˳�����ΰ�װ������װ���κ�һ���ļ��С���װ���gs\gs8.63\bin �µ�gswin32.exe��ִ���ļ���Ghostgum\gsview�µ�gsview32.exe��ִ���ļ�������D:\GMT\bin �¼��ɡ� ������ѧGMT��������Win���ȳ���װ�˸���������װ�����н���˺ܶ����Ϸ��������ϣ���һЩ���߱�ʾ��л��
��1����C:\windows\system32\drivers\etc���ü��±��������hosts�ļ����ڡ������桱������ 209.85.225.101 sites.google.com Ȼ���˳����档 ���ӣ� 209.85.225.101 sites.google.com # Copyright (c) 1993-2009 Microsoft Corp. # # This is a sample HOSTS file used by Microsoft TCP/IP for Windows. # # This file contains the mappings of IP addresses to host names. Each # entry should be kept on an individual line. The IP address should ....... 2������������ڵ�ַ������ https://sites.google.com/site ,�ر�ע��һ����https,��������. ���˵� https://sites.google.com/site/citysimzxq/
���������� http://www.verycd.com/topics/2867641/ ͬʱҲ���Ը����������ʾ��� �������ṩ����һ�ּ��ʽ�� 1������Mathematica_8.0.0_WIN_MachineSpecific.EXE 2������Mathematica_8_kg.exe������ mathpass ��You need vc++ 2010 to run keymaker�������������ء� Mathematica 8.0.rar �� 3�����ļ�mathpass������ C:\Documents and Settings\Administrator\Application Data\Mathematica\Licensing (for XP) C:\Users\Mao Hong\AppData\Roaming\Mathematica\Licensing (for Windows 7) Ŀ¼�С���װ��� 4������Wolfram Mathmatica 8����ʾ�� The password in use by this copy of Mathematica does not allow languages other than English. Contact Wolfram Research ( http://www.wolfram.com ) about enabling additional capabilities. You must restart the front end. ��OK���������Զ��رգ������ģ��ٴ���������ȫ�����ˡ� 5������Wolfram Mathmatica 8 Kernel����ֱ�ӽ�����ѧ���㡣
�������˼���Сʱ֮�������ڰѼ����ϵͳ��װ��һ�顣���ʱ�䱻�˷ѵ�ͬʱ���ָе�Щ�����Ρ����ڵļ����ϵͳԽ��Խ�Ӵ���Խ��Խǿ����Ȼ�����������ͨ�����еĿ����û����������ڵ�ijЩż�����壬��Ա��ʮ��������ں�������һ����ϲ���ġ������Լ���װ�ļ������˵�ɣ���װϵͳ��ζ�Ż�Ҫװһ��ѵ��������������������µ�ghost�����Ǻ��ȶ�����˵������ѧУ�����������������þ��ÿ�ϧ���� �����룬�����壬�Կ�������������֮���Ӳ����������Ӳ���м�������������Щ������Ա�windowsϵͳʶ�𣬴Ӷ�ֱ��ʹ�á��ܴﵽ���̡����ļ��弴�ø��á���������ʡȥ��װ�������鷳�ˡ����⣬windowsϵͳ�İ�װ�ܷ��и�Ĭ���趨������ѡ��ʱ�������û���֮��ģ�������װ�����Ҿ���ȥ�ɱ��ȥ�ˣ����������š���ĵĻ���װ���ٸ�Ҳ����Ҿ�������û��Ҫ��ȥ������ media player��movie maker, DVD maker��ie֮��Ķ����ˣ���Щ����ר�������������ĺ��á���˵��Ҳ�ø�����ʣ�ڷ��ɡ�ʲôʱ��windows �������С����ʮMB���Dz���NB�ء� ��֮�����Ӳ�ƷҪ������������������ھ�����߶�ģ������ϵ��ţ����أ����°�ť����ʼʹ�á�����ʱ����ܱ���Ϊ���������ϵ����Ի���Ʒ��
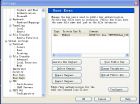
��װMSN 2009ʱ��ʾ����ͼ��ȡ�ļ�c:\windows\installer\messenger.msiʱ�������������취 ��װMSN 2009ʱ��ʱ����֡���ͼ��ȡ�ļ�c:\windows\installer\messenger.msiʱ�������������������ʾ��������Ϊ��ǰ��װ�����ǵ�һЩ�洢��Ϣ���ƻ�������������ж�أ� ���Ľ�Ӧ������Windows Install Clean Up�����������⡣ Windows Install Clean Up ���ص�ַΪ msicuu2.rar ��װ���ڳ����д�Windows Install Clean Up����ʱ�ͻ���ʾ��һ���г��˵�ǰ��Windows Installer��װ��ȥ�ij����б�����ͼ: ��ʱ��ѡ��"windows live messenger"��Ȼ����remove�����Ƶ�����ɾ��"windows live mail"��"windows live picture"�ȣ�������ٰ�װMSN 2009���ܰ�װ���ˡ� Windows Install Clean Up Ҳ���Խ������������װ��ж���������⡣
���죬�������ж���....�����Ĺ�����ҳ���¸�mp3���ŵ㶾��ȥ........ �鱻ľ�������ˣ����˰��죬��������ķ���һ�˰��ˡ��Ͻ������Լ��Dz���Ҳ�Ǻܶ�dll��Ҫ�����ġ�..�����������. http://www.zhucemajipojieban.tk/35/358.htm ���ؿ����� http://www.errornerd.com/error.php?seed=0xc0000094 How Can I Fix 0xc0000094? NEW: writeDate(); Wednesday 19 January 2011 "This is a very common question believe it or not!" 0xc0000094 is usually caused by a corrupt registry entry. The best thing you can do, to prevent your PC from getting more error messages or further registry corruption, is to fix this problem immediately, by following the easy instructions below. The potential risk, resulting from not repairing this error, could include system crashes, blue screens, and hardware failure. Most errors are caused by poor maintenance of your pc. But no-fear , repairing and getting rid of 0xc0000094 can be just as simple as following these 4 steps below: Download the 0xc0000094 Repair Tool "This is a free download - You'll see a new window pop-up for confirmation." Click "Save File" and follow the simple installation instructions. Scan your computer with the Regcure application. Click the "Fix Errors" button to repair 0xc0000094. Why Do Errors Happen? There's actually a number of reasons why 0xc0000094 might of happened, but of course the most common reason is caused when new programs are installed over all old ones that are not completely uninstalled 100%, causing registry pile ups and of course, getting error messages. Another reason, is damage that's been done by malware programs, attaching themselves to your PC and wrecking havoc, deleting crucial files from your PC. 99% of the time, a program called Regcure , designed just for this specific reason, so you don't have to pay some geek like us $90hr to fix your PC, can be used to repair all of your computer's error messages, missing or broken files. Regcure looks over your computer's registry and repairs the following: Internet Explorer errors, ActiveX errors, Javascript and scripting errors, C++ errors, EXE/ DLL/ OCX/ INF/ VXD errors and more. Not to mention, fine tune your computer for maximum performance... "that's why we recommend it!"
When bi-system was installed in one computer,especially both windows andLlinux, we may reinstall one of them. The Grub of Linux would be destroyed when the windows system is update and it would be necessary to reinstall Grub in this case, otherwise we have to reinstall the whole Linux OS. Command for Grub repair in SUSE : 1. insert SUSE OS DVD and boot from "Rescue System" 2. Login with root 3. execute: find /boot/grub/stage1 you should observe something like: (hd0, 6 ) 4. enter Grub shell environment with command " grub " 5. execute: root (hd0, 6 ) 6. execute: setup (hd0) 7. reboot system with command: init 6 or reboot
windows 7 �½�ɽ�ʰ�ȡ�ʱ�����ԭ��ͽ������ ����ľ ��ʿ windows 7 �½�ɽ�ʰԵ�ȡ�ʻ��÷dz�������������ԭ�������Ӿ�Ч�����ڴ��ںͰ�ť��ʹ���Ӿ���ʽ������ɡ�ȥ����һѡ���ʹ��ɽ�ʰ�ȡ���ٶȻָ������� �����������Ϊ���Ҽ����������-����-��ϵͳ����-���ܵ����ã����Ӿ�Ч������ȥ���ڴ��ںͰ�ť��ʹ���Ӿ���ʽ�����Ӧ�ü��ɡ�
ת�ԣ� http://opensuse.swerdna.org/suseboot.html �������������������� HowTo Boot / Multiboot openSUSE and Windows (2000, XP, Vista - any mix) using the GRUB bootloader Versions: Suse/openSUSE 10.x, 11.x Scenario: You have openSUSE and one or more Windows installations on your drives and multibooting using GRUB isn't working. This tutorial leads you through reinstalling the Grub multiboot. You might be interested in a companion tutorial about using the Windows bootloader for multibooting openSUSE and Windows: HowTo Boot Multiboot openSUSE and Windows (2000, XP, Vista - any mix) using the Windows bootloader . If you have no Windows installations, only Linux, you might want to read a companion tutorial for repairing a bootloader with focus on openSUSE, leaving out Windows: HowTo Boot into openSUSE when it won't Boot from the Grub Code on the Hard Drive . If you just want to get the repair done without any introductory palaver, skip to the section HowTo Repair your Grub Multiboot. About Booting Booting Windows with Microsoft Code: Windows 2000 and XP require you to have a primary partition on the first drive for the Microsoft bootloader codes; Microsoft call this the system partition . That's an inappropriate name so I'll call it by the correct name here: the bootloader partition. Windows will only boot from a bootloader partition that is a primary partition on the first drive. You can in fact cause a different drive to appear to Windows XP/2000 as the first drive by using the Grub map function, but your bootloader partition must still be a primary partition. Once the requirement for a bootloader partition (as a primary partition) is met, you may install Windows to higher order partitions, either primary or logical. For 2000, XP and Vista the bootloader partition must be made active or else booting from Microsoft code in the Master Boot Record (MBR) will fail. When you install Vista, it will seek out any existing active partition and make that Vista's bootloader partition. If an active partition does exist and it is a Linux partition, the Vista install will fail. If an active partition doesn't exist, Vista will make it's root partition the bootloader partition and make that partition active. Spare me! Booting openSUSE with Grub Code: Grub can be configured to boot either from the Master Boot Record (MBR) or from a custom partition like /boot or /root. I demonstrate only the method of booting from the MBR in this tutorial. The second configuration is for advanced users because sometimes tweaking is required to get non-MBR booting to work OK after Yast is finished with it. Booting Windows with Grub Code: This simply hands control over to the Microsoft bootloader in the bootloader partition. Curiously, in this instance it isn't necessary for the partition to be marked active. In fact, during installation of openSUSE the active partition is switched from the Windows bootloader partition to Suse's root partition. This is fine provided you switch it back if you want to revert to booting via Microsoft codes (e.g. if you uninstall Linux). HowTo Repair Your Grub Multiboot : Two common problems can arise. The most disconcerting is when you cannot boot to anything. A lesser problem is that you can boot to Suse OK but not to Windows. There are a couple of methods for correcting these problems but I'll only cover one here that I think is good for new users. It's a three step process. First you get an assisted boot to the Suse installation. Then in step 2 you use Yast to completely recalculate and rewrite the Grub installation including rewriting the MBR. Finally, in step 3, you check and maybe alter Yast's new configuration for booting into Windows. Step 1 for Suse/openSUSE 10.x - Assisted Boot into openSUSE: Insert Suse's installation DVD and reboot the computer. Commence the installation process but only carry it forward a few steps. Click Next thought the Language screen. In the Media Check screen, do not click Start Check but simply click Next to skip to the the next screen. Agree to the Licence and Next to the Installation Mode screen. Here you select Other Options. That will allow you to select to Boot Installed System. Select that and click next to proceed. GoTo step 2 Step 1 for openSUSE 11.x - Assisted Boot into openSUSE: Insert Suse's installation DVD and reboot the computer. On the boot screen choose to Repair Installed System. On the page titled Repair Method, select Expert Tools. Then click option Install New Boot Loader. Select the partition where you installed Suse (if asked). You'll get the Grub GUI setup screen. Check under the Tab Boot Loader Installation that the checkmark is in Boot from Master Boot Record and remove any other checkmarks. Click Finish. Wait for message The boot loader was installed successfully. Click OK -- Next -- Finish. Ignore any error messages and reboot. That should install an elementary Grub and allow you to boot to openSUSE. So do that and it will take you to step 2 Step 2 - Reinitialise and Reinstall Grub: Once Suse has fully booted and settled down, go to Yast -- System -- Boot Loader. The Grub configuration screen comes up with the Tab Section Management activated. In the lower right is a drop-down selector labelled Other. Select from Other the option Propose New Configuration and then wait for Grub to analyse your partitions and display a new configuration. This may take a while. Important: When that finishes, activate the tab labelled Boot Loader Installation and select to Boot from the Master Boot Record. Then click Finish to save the changes and install the reconfigured Grub into the hard drive's MBR. If you get a message that The bootloader boot sector will be written to a floppy disk ......... don't bother with the floppy -- just click OK to proceed and install to the MBR. Reboot and you should be able to boot to openSUSE using the Grub menu screen. Frequently you can also boot to Windows after completing Step 2, so try that too and maybe you won't need Step 3 Step 3 - Check/Repair Yast's Grub Configuration for Booting into Windows: The symptoms are that when you boot you can see Grub's menu and can select to boot to openSUSE successfully but if you select to boot to Windows, it fails. The solution is to boot into openSUSE and edit the Grub menu configuration file (menu.lst) located at /boot/grub/menu.lst. Menu.lst is a simple text file so you can use the following command in a console to open the file in a text editor with superuser permissions: kdesu kwrite /boot/grub/menu.lst The line above is for Kwrite in KDE while the line below is for Gedit in Gnome. gnomesu gedit /boot/grub/menu.lst Open menu.lst and locate the entry for Windows; there will generally be as many entries as there are VFAT and NTFS partitions on your drives. The trick is to identify the entry corresponding to the Windows Bootloader partition -- and then you can delete the spurious extra entries. I will show correct entries for some common cases to help you identify your situation and the correct entry for that situation: Bootloader in partition 1 of drive 1 : This is the most commonly occurring location. It matches most OEM desktops where 2000 and/or XP and/or Vista are installed in a straightforward fashion: title Windows bootloader menu # -- put whatever you want here rootnoverify (hd0,0) chainloader (hd0,0)+1 Bootloader in partition 2 of drive 1 : Some laptops and some mass-produced name-brand desktops have a special Utility partition as the first partition of the first drive. It's hidden from Windows. Windows makes the second partition the bootloader partition: title Windows bootloader menu rootnoverify (hd0,1) chainloader (hd0,1)+1 A Windows 2000/XP Bootloader is in partition 1 of drive 2 because you swapped drives : If you install 2000 or XP on the primary drive and then swap drives; i.e. you swap a hard drive with 2000 and/or XP on it from the primary drive channel to the secondary drive channel -- you need to include the Grub map function to rectify the switch for the 2000/XP file boot.ini: title Win 2000/XP bootloader menu for switched drive map (hd0) (hd1) map (hd1) (hd0) rootnoverify (hd1,0) chainloader (hd1,0)+1 A Vista Bootloader is in partition 1 of drive 2 because you swapped drives : If you install Vista alone on a primary drive and then swap drives OR if you first install 2000 or XP on the drive and then Vista and then swap drives; i.e. you swap a hard drive with Vista on it from the primary drive channel to the secondary drive channel -- NOTE that Vista completely ignores the map function that XP/2000 needed in the example above, so leave it out: title Vista bootloader menu for switched drive rootnoverify (hd1,0) chainloader (hd1,0)+1 If you really want to verify which is the bootloader partition, then find the partition that contains the bootloader files: In Windows 2000/XP they are ntldr , ntdetect.com and boot.ini . Vista's visible bootloader files are bootmgr and the directory boot . Well that should get you booting again. If you are still puzzled, browse on over to openSUSE Forums and recount your problem in the Install/Boot Forum. APPENDIX: Some Common Error Messages : Here are some of the error messages you might see on your boot screen after a failed boot. You check and correct them in menu.lst at /boot/grub/menu.lst. My advice is first check the error out in menu.lst and see if it's real, second to reinstall Grub as per the section above regardless of what you found in menu.lst, third then see whether the flaw persists in the new menu.lst and correct it by editing if it does persist. Error 13: Invalid or unsupported executable format : Is the entry pointing to a non-bootable partition (e.g. storage)? Error 15: File not found : Is the entry designating the correct file (e.g. kernel entry)? Error 22: No such Partition : Is the entry pointing to a real partition. This can happen after you alter your partitions. No error number, just a message like this: rootnoverify (hd0,1) chainloader (hd0,1)+1 This is not a bootable disk ...... Is the entry pointing to a Windows system32 partition that is not a bootloader partition? Bootloader files must be on the first partition for Windows 2000/XP to boot. No error number, just a message like this: rootnoverify (hd1,0) chainloader (hd1,0)+1 A disk read error occurred Press Ctrl+Alt+Del to restart Is the entry for a second or higher drive without the drive mapping function map (hd0) (hd1) etc? Recommended reading: GRUB bootloader - Full tutorial and also Gnu Grub Manual . Circa April 2006; last revised July 16 2009 ������������������������������ http://opensuse.swerdna.org/suseboot.html
cygwin��һ����windowsƽ̨�����е�unixģ�������cygnus solutions��˾�����������������ù�˾�����˺ܶ�ö����������Ļ���eCos���������ѱ�Redhat�չ�����������ѧϰunix/linux�������������ߴ�unix��windows��Ӧ�ó�����ֲ�����߽���ijЩ����Ŀ���������������ʹ��gnu������windows�Ͻ���Ƕ��ʽϵͳ�������dz����á�����Ƕ��ʽϵͳ�����ڹ����ս����У�Խ��Խ��Ŀ����߶�cygwin��������Ȥ�� cygnus�������Ȱ�gcc��gdb��gas�ȿ������߽����˸Ľ���ʹ�����ܹ����ɲ�����win32��Ŀ���ļ���Ȼ������Ҫ����Щ������ֲ��windowsƽ̨��ȥ��һ�ַ����ǻ���win32 api����Щ���ߵ�Դ������д���ģ���������Ȼ��Ҫ������������ˣ����Dz�ȡ��һ�ֲ�ͬ�ķ�������д��һ��������(����cygwin dll)����win32 api��û�е�unix���ĵ��ã���fork,spawn,signals,select,sockets�ȣ���װ�����棬Ҳ����˵�����ǻ���win32 apiд��һ��unixϵͳ���ģ��㡣������ֻҪ����Щ���ߵ�Դ�����������������ӵ�һ�𣬾Ϳ���ʹ��unix�����ϵĽ�������������ɿ�����windowsƽ̨�����еĹ���������Щ��ֲ��windowsƽ̨�ϵĿ�������Ϊ������cygnus���������Ĺ��ߣ���������Ҫ��Դ��������ģ�ֻ��Ҫ�����ǵ����ýű���������ֲ��windows��������������windowsƽ̨������bash�Ϳ������ߡ��û����ߣ��о�������unix�Ϲ����� ����cygwinʵ�ֵĸ���ϸ��������ο� http://cygwin.com/cygwin-ug-net/highlights.html. ��װ������cygwin�����Ե� http://cygwin.com �����Install Cygwin Now!��������������һ������setup.exe��GUI��װ��������������һ��������cygwin������ÿһ����ָʾ���Է���Ľ��а�װ�� ��ʼ����bash֮ǰ��Ӧ������һЩ����������cygwin�ṩ��һ��.bat�ļ��������Ѿ����ú�������Ҫ�Ļ���������ͨ����������bash���ȫ�İ취�����.bat�ļ���װ��cygwin���ڵĸ�Ŀ¼�¡� ��������༭���ļ��� CYGWIN�����������cygwin����ʱϵͳ���ж���ȫ�����á���ʼʱ�����Բ�����CYGWIN������ִ��bashǰ����������ĸ�ʽ��dos���°�����Ϊtty C:\ set CYGWIN=tty notitle glob PATH������cygwinӦ�ó�����Ϊ������֪���ļ���·���б�����һ��cygwin��������ʱ���ñ�������windows��ʽ(e.g. C:\WinNT\system32;C:\WinNT)ת����unix��ʽ(e.g., /WinNT/system32:/WinNT)��������ڲ�����bash��ʱ��Ҳ�ܹ�ʹ��cygwin������PATH����Ӧ�ð���x:\cygwin\bin������x:\cygwin �����ϵͳ�е�cygwinĿ¼�� HOME��������ָ����Ŀ¼���Ƽ���ִ��bashǰ����ñ�������cygwin��������ʱ���ñ���Ҳ����windows��ʽת����unix��ʽ�����磬���ߵĻ�����HOME��ֵΪC:\��dos����set HOME�Ϳ��Կ�������ֵ��set HOME=XXX���Խ������ã�����bash����echo $HOME������ֵΪ/cygdrive/c. TERM����ָ���ն���̬������������������ã������Զ���Ϊcygwin�� LD_LIBRARY_PATH��cygwin����dlopen()��Ϊ����.dll�ļ���·���б����ñ���Ҳ����windows��ʽת����unix��ʽ������CygwinӦ�ó���ʹ��dlopen,�������Ҫ�ñ����� Cygwin����ȱʡ���Է�����ڴ治����384 MB(program+data)����������²���Ҫ��������ơ�Ȼ���������Ҫ����ʵ�ʻ������ڴ棬Ӧ����ע�����HKEY_LOCAL_MACHINE��HKEY_CURRENT_USER���Ρ����һ��DWORD��heap_chunk_in_mb��������ֵ��Ϊ��Ҫ���ڴ����ƣ���λ��ʮ����MB��Ҳ������cygwin�е�regtool��ɸ����á��������£� regtool -i set /HKLM/Software/Cygnus\ Solutions/Cygwin/heap_chunk_in_mb 1024 regtool -v list /HKLM/Software/Cygnus\ Solutions/Cygwin ��һ�ν�һ��cygwin�ʹ�ͳunixϵͳ�IJ�֮ͬ���� cygwinͬʱ֧��win32��posix����·����·���ָ�����������б��Ҳ�����Ƿ�б�ܡ���֧��UNC·���������������У�UNC��һ��ȷ���ļ�λ�õķ�����ʹ�����ַ����û����Բ����Ĵ洢�豸������λ�ã��������û�ʹ�á���Windows����ϵͳ��Novell Netware����������ϵͳ�У����Ѿ�ʹ�������ֹ淶��ȡ����������ϵͳ����UNC�У����Dz��ù����ļ���ʲô�̣�������ϣ����ù�������̣���������ڷ�������ʲô�ط�������ֻҪ�������ʽ�Ϳ��Է����ļ��� \\��������\������\·��\�ļ��� ��������ʱҲ����Ϊ�ļ����ھ���洢�豸������ʶ����ʹ������Ŀ�������û����ع�����Щ����洢�豸���ڵ�����λ�á��� ����posix���IJ���ϵͳ����linux��û���̷��ĸ�����еľ���·������һ��б�ܿ�ʼ���������̷�����c:�������е��ļ�ϵͳ�������е���Ŀ¼�����磬����Ӳ�̣�����֮һΪ������һ����������/disk2·���¡� ��Ϊ����unixϵͳ�ϵij���ٶ����ڵ�һ��posix�ļ�ϵͳ�ṹ������cygwinר��ά����һ�����win32�ļ�ϵͳ���ڲ�posix��ͼ��ʹ��Щ���������windows����ȷ���С���ijЩ��Ҫ������£�cygwin��ʹ������ӳ��������win32��posix·��֮���ת���� cygwin�е�mount����������win32�̷������繲��·��ӳ�䵽cygwin���ڲ�posixĿ¼�������������unix mount�������Ƶĸ��������Щ��unix����Ϥ������windows�����ĵ�����˵��mount��������ڵ�dos����join�dz����ƣ����ǰ�һ���̷���Ϊ����·������Ŀ¼�� ·��ӳ����Ϣ����ڵ�ǰ�û���cygwin mount���У����mount table ����windows��ע����С������������û���һ�ε�¼����ʱ����Щ��Ϣ�ִ�ע�����ȡ����mount ����Ϊ���֣�����ÿ���û��ض��ı�������ϵͳ��Χ��mount����ÿ��cygwin�û��İ�װ�����̳���ϵͳ����ϵͳ��ֻ����ӵ�к���Ȩ���û���windows nt�Ĺ���Ա���ġ���ǰ�û���mount��������ע���HKEY_CURRENT_USER/Software/Red Hat, Inc./Cygwin/mounts v �¿�����ϵͳ������HKEY_LOCAL_MACHINE�¡�posix��·��/ȱʡָ��ϵͳ���������ǿ���ʹ��mount��������ָ��windows�ļ�ϵͳ�е��κ�·����cygwin��win32·������posix·��ʱ������ʹ��mount�������ǰ���������c:��ͬʱ��װ��/c��/��cygwin����C:/foo/barת����/c/foo/bar. ��������κβ����ص���mount������Cygwin��ǰ��װ�㼯��ȫ���г���������������У�c����POSIX������d�̱�ӳ�䵽/d�������У�����һ��ϵͳ��Χ�İ�װ�㣬���������û����ǿɼ��ģ���/d���Ե�ǰ�û��ɼ��� c:\ mount f:\cygwin\bin on /usr/bin type system (binmode) f:\cygwin\lib on /usr/lib type system (binmode) f:\cygwin on / type system (binmode) e:\src on /usr/src type system (binmode) c: on /cygdrive/c type user (binmode,noumount) e: on /cygdrive/e type user (binmode,noumount) ������ʹ��mount���������µİ�װ�㣬��umountɾ����װ�㡣 ��Cygwin���ܸ������еİ�װ���ij��win32·��ת��Ϊposix·��ʱ��cygwin���Զ�����ת����һ������ȱʡposix·��/cygdrive�µĵ�һ����װ��. ���磬���Cygwin ����Z:\foo����Z�̵�ǰ���ڰ�װ���ڣ���ôZ:\�����Զ�ת����/cygdrive/Z. ���Ը�ÿ����װ�㸳����������ԡ��Զ���װ�ķ�����ʾΪauto��װ����װ�㻹����ѡ����textmode���� binmode��������Ծ������ı��ļ��Ͷ������ļ��Ƿ�ͬ���ķ�ʽ������ cygpath�����ṩ����shell�ű��н���win32-posix·����ʽת���������� HOME, PATH,��LD_LIBRARY_PATH������������cygwin��������ʱ�Զ�����Win32��ʽת������POSIX��ʽ(���磬������ڴӸ�win32·����posix·���İ�װ�����c:\cygwin\binתΪ/bin)��
 ��ǩ: windows